About this deal
Drill a hole in the side of the water butt, 8cm down from the top. The hole needs to be just the right size to fit the connector fitting of the diverter through. Fit the connector piece in place by pushing it through the hole you just drilled and screwing the supplied washer and nut on. The morning and evening are the best times to water your plants as the water doesn’t evaporate in the heat of the day before it can reach the roots Insert the diverter into the slot. The design of the rainwater diverter assures that your water butt will never overflow as any excess water will continue to flow into the downpipe.
Watering too often can keep roots shallow and weaken plants; wait for signs that the plant is suffering before watering Attach the rainwater diverter to the downpipe where you have cut it off. Attach the piece of pipe you cut off to the bottom of the diverter. I connected two water butts at the bottom by replacing the taps with 22mm tank connnectors and linking together. The advantage of linking at the bottom is that water can be taken from both butts with one tap. Linking at the top requires two taps, one for each butt to kake use of the water! Downpipe plastic or mesh guards are excellent accessories which will stop leaves and other debris getting into your water butt. There are very easy to install and feature flexible slats to enable you to adjust them to fit the width of any downpipe opening. All water butts should be sold with a lid, both for safety and to keep the water fresh by stopping leaves and other debris from falling in. If you have young children, look out for water butts that feature a child-safe lid.Each water butt comes with a threaded hole in the side and a tap to fit, so it’s a case of screwing one into the other, nice and tight. Let's not forget the old faithful watering can that's found in just about every garden in the UK - we feature several types of plastic and gavanised metal cans to cater for all your trips from you butt to your flower beds and greenhouse. There are also plenty of cleaning accessories available for cleaning the interior of a water butt. The products available to buy for reducing smells, scum, algae, harmful bacteria and green water come in liquid or tablet form. There are also silver and copper anti-microbial water cleaner discs which use industrial silver which is also found in water purifiers and other cleansing devices. These tablets can destroy fungal and micro-organisms and are also safe to use in ponds, fish tanks, horse troughs and bird baths. When you buy a water butt or barrel is will usually comprise the main plastic water container, a lid and a downpipe diverter to allow you to direct water from your gutter into the barrel. Most butts also come with a stand to rest the container on and a tap to get water out of the container into a watering can or other device.
There are some things that you can do to help to make the water you collect in your water butt go that little bit further: Attach the diverter to the water butt with the piece of pipe supplied. Fit the lid onto the water butt and wait for it to rain!
Some Water Saving Tips
Your plants will certainly thank you for installing a butt, as rainwater is much better for plants than tap water. A water butt can be fitted to any downpipe where there is space to sit a container either directly underneath or nearby. They are easy and cheap to fit and can be an attractive feature in the garden. Choosing a Water Butt Water butt connecting kits are available if you want to install more than one water butt to a downpipe. The results in the all too common hosepipe ban restricting water usage in your garden. Installing one or more water butts to save rainwater is the best way to create a ready supply of free water for your plants, protecting you from having to go without when there is a ban in place.
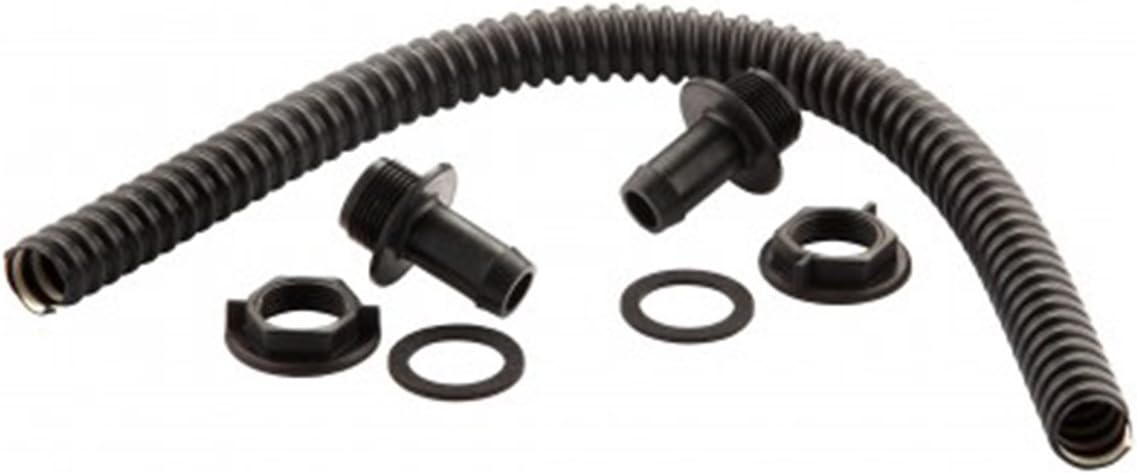
Most water butts come with all the essential parts, instructions and basic accessories to get you up and running - but there are plenty of other handy extras you can buy to really get the best out of your new water harvesting container. Place the water butt on its stand and using a spirit level, level it with the bottom of the hole and align it with the water pipe and draw a line.You can either cut off the downpipe and place the water butt directly below it, with the cut-off pipe going through a hole in the lid, or you can install a rainwater diverter. This is often a better option as it means that an overflow pipe is not required, and it gives more flexibility for sitting the butt. There are various accessories which can support your water-harvesting efforts - a submersible electric pump, for example, will allow you to get more pressurised water from your container. These water butt connection kits include a 1-2 metre length of very flexible hose, and all the fixtures and fittings necessary to make a secure watertight connection to each water butt– plastic bolts and rubber washers. Use a watering can rather than a hose pipe as this will significantly reduce the amount of water you use As a business journalist, Camilla has researched articles for many different sectors from the jewellery industry to finance and tech, charities, and the arts. Whatever she’s covered, she enjoys delving deep and learning the ins and out of different topics, then conveying her research within engaging content that informs the reader.
 Great Deal